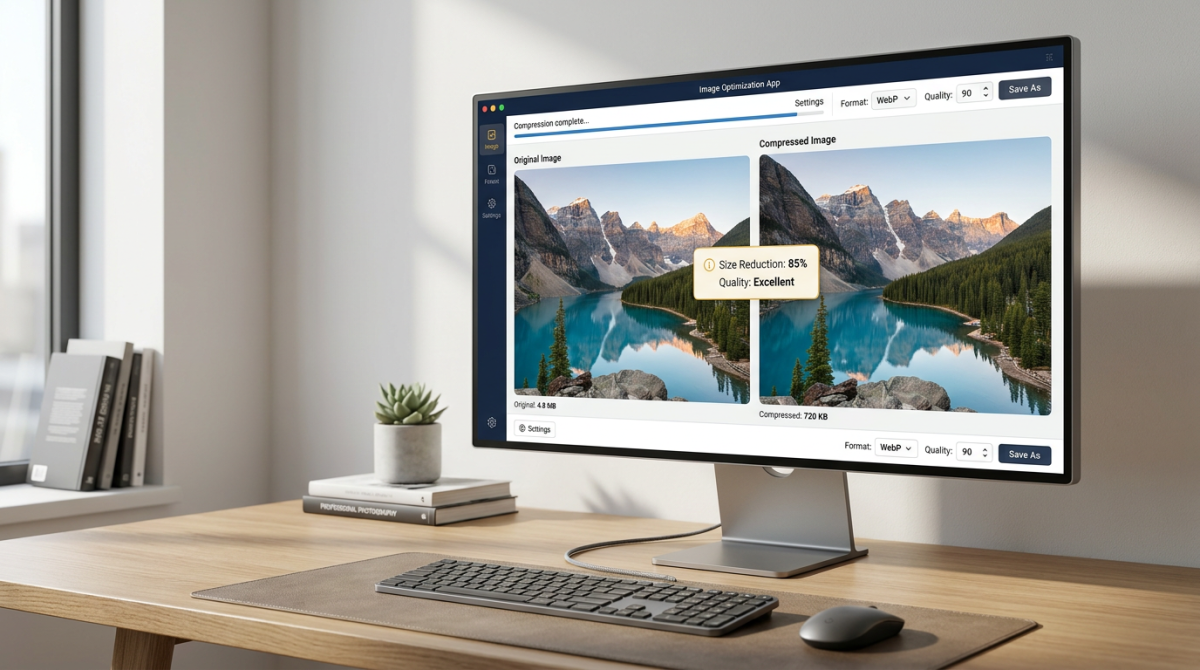
Learning how to compress an image without losing quality is one of the highest-impact skills for websites, email, social media, and app uploads. Large photos slow pages, waste bandwidth, and get rejected by size limits — yet aggressive compression can introduce blur, banding, and artifacts. The goal is simple: reduce image file size while the picture still looks sharp to the human eye.
This guide explains how image compression works, which formats to choose, how to resize without making photos blurry, and how to compress photos online with a private browser tool. You can start immediately with FlashFile’s free Image Compressor — processing stays on your device. For more utilities, browse the full Image Tools directory.
Quick Answer: Compress Image File Size the Smart Way
- Pick the right format (WebP or JPG for photos; PNG for graphics with transparency).
- Resize only if pixel dimensions exceed the size you actually display or upload.
- Compress at quality around 75–90 and compare original vs compressed.
- Strip unnecessary metadata to save extra kilobytes.
- Download the optimized file and verify it still looks excellent on a real screen.
That workflow is how professionals reduce image size without a visible quality crash. The sections below go deeper on each step.
What Does It Mean to Compress an Image?
Image compression reduces the number of bytes needed to store a picture. There are two broad approaches:
- Lossless compression keeps every pixel value reconstructible (typical of well-encoded PNG). File size drops by removing redundancy, not detail.
- Lossy compression discards information the eye is less likely to notice (typical of JPG and lossy WebP). Higher quality settings discard less; lower settings shrink more aggressively.
“Without losing quality” in everyday language usually means without a noticeable drop — not a mathematical guarantee of bit-identical pixels. Smart lossy settings plus correct dimensions often look identical on screen while cutting file size dramatically.
Why Reduce Image File Size?
- Faster websites and better SEO: Lighter images improve Core Web Vitals and user experience.
- Email and form limits: Many portals cap uploads at 100KB, 200KB, or a few megabytes.
- Mobile data and storage: Smaller photos cost less to send and store.
- Social and marketplace listings: Platforms re-encode uploads; starting from a clean, reasonably sized file helps.
How to Compress an Image Without Losing Quality
Follow this practical sequence whenever you need to compress an image without losing quality:
Step 1 — Open a private online compressor
Use FlashFile’s Image Compressor. It runs entirely in your browser with a quality slider, presets, and clear before/after file sizes so you can judge real savings.
Step 2 — Upload JPG, PNG, or WebP
Drop one or more images into the tool. Prefer the highest-quality source you have (avoid re-compressing an already heavy JPG multiple times when you still have the original).
Step 3 — Start high, then lower quality carefully
Begin around 85–90 for hero photos and product shots. If the file is still large, step down toward 75. Stop when you see blocking, muddy gradients, or soft edges. Balanced presets are ideal for most web use.
Step 4 — Compare size reduction and visual quality
Good tools show original vs compressed size and a preview. A 60–85% size reduction with “excellent” perceived quality is common for camera photos exported as WebP or optimized JPG.
Step 5 — Download and use the optimized file
Save the result and keep the original master archive if you may need a larger version later. For strict caps, try Compress Image to 100KB or Compress Image to 200KB.
How to Reduce Image Size Without Making It Blurry
Blurry results usually come from the wrong kind of “smaller,” not from compression itself. Separate two ideas:
- File size (KB/MB) — bytes on disk. Controlled mainly by format and quality.
- Pixel size (width × height) — resolution. Controlled by resizing.
To reduce image size without making it blurry:
- Decide the maximum display width (for example 1600px for a blog hero).
- Use an Image Resizer to match that width instead of shipping a 24-megapixel original.
- Export with high-quality resampling, then apply moderate compression.
- Avoid enlarging small images — upscaling cannot invent true detail.
- Do not stack many lossy exports; edit from the master when possible.
When you only need a lighter file at the same dimensions, skip aggressive downscaling and use quality reduction or format conversion instead — for example the Image Quality Reducer.
Choose the Right Image Format
Format choice often saves more bytes than tiny quality tweaks. For a deeper comparison, read PNG vs JPG: Which Image Format Should You Use?.
- JPG: Best default for photographs and complex gradients. Excellent compression; no transparency.
- PNG: Best for logos, UI, screenshots with text, and transparency. Larger for photos.
- WebP: Modern option that often beats JPG/PNG on size at similar quality. Ideal for web delivery when browsers support it (nearly universal today).
A common high-quality path: keep a PNG or high-quality master, deliver WebP or optimized JPG on the site. Convert with FlashFile’s image tools, then compress.
How to Compress Multiple Images
Batch work is essential for galleries, product catalogs, and blog archives. A Bulk Image Compressor lets you drop many files, apply the same quality preset, and download each optimized result without repeating the workflow one photo at a time.
- Group similar images (all product shots, all hero banners) so one preset fits the set.
- Spot-check a few previews before downloading the whole batch.
- Keep originals in a separate folder until you confirm the batch looks right.
- Use consistent max dimensions across a gallery for a uniform look and predictable sizes.
Tips for Compressing Images
- Strip metadata: Camera EXIF and GPS tags add weight and can leak location. Use the Image Metadata Remover for a clean, smaller export.
- Match the use case: Thumbnails can be much smaller than print-ready files. Do not use one setting for every context.
- Watch flat areas and text: Skies, gradients, and sharp UI text show artifacts first — raise quality if you see banding.
- Prefer one good export: Re-saving a JPG repeatedly stacks loss. Always return to the master when possible.
- Combine resize + compress: Oversized dimensions waste the most space. Resize, then compress.
- Stay client-side for private photos: IDs, invoices, and personal albums should not be uploaded to unknown servers.
Common Mistakes When You Compress Photos Online
- Crushing quality to 20–40% when 75–85% would have met the size limit with better looks.
- Leaving a 4000×3000 image untouched when the layout only shows 800px width.
- Using PNG for large photographs instead of JPG or WebP.
- Ignoring metadata that adds tens of kilobytes per file across a large set.
- Trusting upload-based “free” tools with sensitive images.
Privacy: Why Client-Side Compression Matters
Many online compressors upload your file to a remote server. FlashFile tools process images locally in the browser with the Canvas API. That means: 100% Client-Side — Your image never leaves your device. You get the convenience of compress photos online without giving up control of the file.
Related Guides
Frequently Asked Questions
How do I compress an image without losing quality?
Use smart compression: choose WebP or optimized JPG, start at quality 80–90, strip metadata, and only resize when the pixel dimensions are larger than you need. Compare original and compressed side by side before downloading.
What is the best format to compress photos online?
For photographs, WebP or JPG usually give the best size-to-quality ratio. Use PNG for graphics with sharp edges or transparency. Convert when needed, then compress with a quality slider.
Does compressing an image always make it blurry?
No. Moderate lossy compression and correct resizing keep photos looking sharp. Blurriness usually comes from over-compressing (very low quality) or shrinking dimensions too aggressively.
Can I reduce image file size without changing dimensions?
Yes. Lowering JPG/WebP quality slightly, re-encoding PNG efficiently, and removing EXIF metadata all reduce file size while keeping the same width and height.
Is it safe to compress photos online?
Upload-based tools send your files to a server. Prefer a client-side online image compressor that processes images in the browser so photos never leave your device.
How much can I compress an image?
Many photos shrink 50–85% with little visible change when you pick the right format and quality. Exact savings depend on content, original format, and target quality.
Should I resize before I compress?
If the image is far larger than the display size (for example a 6000px photo for a 1200px blog hero), resize first, then compress. Fewer pixels mean a smaller file at the same visual quality.
Can I compress multiple images at once?
Yes. Use a bulk image compressor that accepts several files, applies the same quality settings, and lets you download each result or a batch of optimized images.
Conclusion
You can compress an image without losing quality by combining the right format, sensible dimensions, and moderate lossy settings — then verifying the preview. Resize when pixels are excess baggage, strip metadata you do not need, and avoid extreme quality values unless a hard size cap forces them.
Ready to optimize your next photo? Open the free Image Compressor on FlashFile and shrink file size in your browser while keeping visuals excellent.
Related FlashFile Tools
Free client-side tools from this guide — your files stay on your device.
Compress Images Without Losing Quality
Free, fast, and private. Reduce image file size with live previews — 100% client-side in your browser.
Related Articles
Keep reading — more PDF and image conversion guides from the FlashFile blog.
 Image Tools
Complete Guide to Image Compression in 2026: How to Compress Images Without Losing Quality
Learn how image compression works, how to compress JPG and PNG images, reduce image file size without noticeable quality loss, and optimize images for websites and everyday use.
Read More Image Tools
How to Compress an Image to 100KB Online
Learn how to compress an image to 100KB online — best formats, resizing tips, quality-preserving techniques, and private browser tools.
Read More Image & PDF Guides
How to Convert Multiple JPG Images into One PDF
Learn how to convert multiple JPG images into one PDF online. Combine photos and scanned pages, arrange images, reduce file size, and create a single PDF.
Read More